Category: Editorial

  • How to Back Up SMS and Call Logs on Samsung

    How to Back Up SMS and Call Logs on Samsung

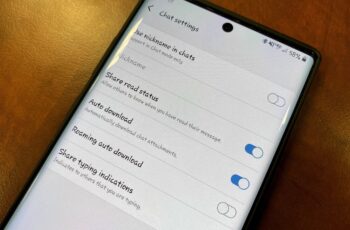
    RCS (Rich Communication Services) messaging is the modern evolution of SMS, offering a more engaging and feature-rich texting experience. Think of it as iMessage for Android, bringing features like read receipts, typing indicators, high-quality photo and video sharing, and group chat enhancements directly into your default messaging app. If you own a Samsung Galaxy device, you’ll likely be using Google Messages as your default, which is the primary app for RCS messaging.

    Why Use RCS Messaging?

    RCS messaging offers significant upgrades over traditional SMS/MMS:

    • Read Receipts: See when your messages have been delivered and read.
    • Typing Indicators: Know when the other person is typing a reply.
    • High-Quality Media: Send and receive crisp, uncompressed photos and videos, unlike the heavily compressed media sent via MMS.
    • Larger Group Chats: Enjoy more robust group messaging with features similar to popular chat apps.
    • Richer Features: Potential for file sharing, location sharing, and more interactive experiences.
    • Wi-Fi Messaging: Send messages over Wi-Fi, which can save on cellular data and work in areas with poor signal.

    Important Prerequisites for RCS Messaging

    For RCS messaging to work, both you and the person you are texting must:

    • Have a Samsung Galaxy device (or any Android phone) that supports RCS. Most modern Android phones do.
    • Be using an RCS-enabled messaging app, primarily Google Messages. While Samsung’s stock Messages app used to support RCS, Google Messages is now the universally recommended and often pre-installed app for RCS on Samsung.
    • Have RCS Chat features enabled in their messaging app settings.
    • Be connected to the internet (Wi-Fi or mobile data).
    • Your mobile carrier must support RCS. Most major carriers do.

    How to Enable and Use RCS Messaging on Your Samsung Galaxy

    The process involves ensuring you’re using Google Messages and then activating the Chat features.

    Step 1: Set Google Messages as Your Default Messaging App

    Many new Samsung Galaxy phones come with Google Messages pre-installed and set as default. If not, you’ll need to install it and set it as your primary messaging app.

    1. Download Google Messages: If you don’t have it, open the Google Play Store, search for “Google Messages,” and install it.
    2. Open Settings: From your home screen, swipe down from the top to open the Quick Settings panel, then tap the Gear icon (Settings).
    3. Navigate to Apps: Scroll down and tap on Apps.
    4. Choose Default Apps: Tap on Choose default apps (or Default apps).
    5. Set SMS App: Tap on SMS app.
    6. Select Messages: Choose “Messages” (which will be the Google Messages app, identified by its colorful icon) from the list. Confirm if prompted.

    Step 2: Enable Chat Features in Google Messages

    Once Google Messages is your default, you need to turn on Chat features.

    1. Open Google Messages: Launch the Messages app from your home screen or app drawer.
    2. Access Settings:
      • Tap on your profile icon in the top right corner.
      • Tap Messages settings.
    3. Go to Chat Features: Tap on Chat features.
    4. Turn On Chat Features:
      • You will see a toggle for “Enable chat features.” Turn this ON.
      • If you see “Connecting…” or “Setting up…”, your phone is trying to connect to Google’s RCS servers. This might take a few moments.
      • Once connected, the status will change to “Connected.” This means RCS messaging is now active for your number.

    Step 3: Start an RCS Conversation

    Once Chat features are enabled and “Connected,” you can start enjoying the benefits of RCS messaging.

    1. Open Google Messages: Go back to the main conversation list.
    2. Start a New Message: Tap the “Start chat” or “+” icon (depending on your Messages app version) to compose a new message.
    3. Select a Contact: Choose a contact that also has RCS Chat features enabled.
      • How to know if a contact has RCS: In the compose message field, you’ll see “Chat message” (or “RCS message”) instead of “Text message” or “SMS message.” The send button might also be a darker blue. If it says “Text message,” they don’t have RCS enabled, and your message will send as a regular SMS/MMS.
    4. Send Your Message: Type your message and tap the send button.

    Step 4: Utilize RCS Features

    In an active RCS conversation, you’ll notice:

    • Read Receipts: A small “Read” notification will appear under your sent message when the recipient has viewed it.
    • Typing Indicators: A small animation or text (e.g., “Typing…”) will appear at the top of the conversation when the other person is writing.
    • High-Quality Media: When you attach photos or videos, they will send in much higher quality than traditional MMS. Tap the “+” icon next to the message field to attach media.
    • Reactions: Long-press on a message you received to react with an emoji.
    • Replies: Long-press on a message to directly reply to it, creating a threaded conversation.

    Troubleshooting Common RCS Issues

    • “Chat features unavailable for this device/number”:
      • Internet Connection: Ensure you have a stable Wi-Fi or mobile data connection.
      • Carrier Support: Verify your mobile carrier supports RCS messaging.
      • Google Messages Version: Make sure your Google Messages app is updated to the latest version.
      • Verify Phone Number: In Messages settings > Chat features, ensure your correct phone number is listed and verified. Sometimes, toggling Chat features OFF and then ON again can re-initiate the verification process.
    • Messages Sending as SMS/MMS:
      • Recipient’s Status: The most common reason is that the recipient does not have RCS Chat features enabled on their end or isn’t using an RCS-compatible app.
      • Poor Internet Connection: If your internet connection is weak, messages might revert to SMS/MMS to ensure delivery.
      • Toggle Off Chat Features for Specific Contacts: In a chat with a specific contact, you can sometimes long-press the send button to switch to SMS/MMS if RCS is having issues.
    • Messages Not Being Received:
      • Clear Cache: Go to Settings > Apps > Messages > Storage > Clear cache and then Clear data. This often resolves minor glitches. (Note: Clearing data will not delete your messages, but it may require you to re-enable chat features).
      • Restart Phone: A simple restart can resolve temporary network or app issues.

    By following these steps, you can confidently enable and use RCS messaging on your Samsung Galaxy phone, transforming your everyday texting into a richer, more interactive experience that aligns with modern communication standards.

  • How to Check System Information on Your Windows PC

    How to Check System Information on Your Windows PC

    Understanding your computer’s specifications is crucial for various reasons, from troubleshooting issues to upgrading hardware or ensuring software compatibility. Whether you’re a gamer, a creative professional, or simply a casual user, knowing your system’s heartbeat can save you time and frustration. This guide will walk you through several straightforward methods to check your Windows PC’s system information.

    For decades, users have needed to access system details. Early operating systems provided rudimentary ways, but with Windows, these tools have become more refined and accessible, offering a comprehensive look under the hood.

    Why You Might Need Your System Information

    Before we dive into the “how-to,” let’s briefly touch on “why.” You might need this information to:

    • Troubleshoot problems: If your PC is acting up, knowing your RAM (Random Access Memory), CPU (Central Processing Unit), and OS version (Operating System version) can help diagnose the issue or provide crucial details when seeking technical support.
    • Upgrade hardware: Planning to add more RAM or a new graphics card? You’ll need to know your current setup to ensure compatibility.
    • Install software: Many applications have minimum system requirements. Checking your specifications beforehand prevents installation errors or poor performance.
    • Sell or buy a PC: Accurate system information is vital for transparent transactions.
    • Gaming: Gamers frequently check their GPU (Graphics Processing Unit) and CPU to ensure their rig can handle the latest titles.

    Now, let’s explore the various ways to check your system information.

    Method 1: Using the About Page in Settings (Windows 10/11)

    This is perhaps the most user-friendly way to get a quick overview of your system.

    Steps:

    1. Open Settings:
      • Click the Start button (Windows logo) on your taskbar.
      • Click the gear icon to open Settings. Alternatively, you can press Windows key + I.
    2. Navigate to System:
      • In the Settings window, click on System.
    3. Access About:
      • Scroll down the left-hand menu and click on About.

    What you’ll find here:

    • Device name: The name of your computer on the network.
    • Processor (CPU): Details about your central processing unit, including its manufacturer (e.g., Intel, AMD) and model (e.g., Core i7, Ryzen 7). The CPU is the “brain” of your computer, responsible for executing instructions.
    • Installed RAM: The amount of Random Access Memory installed in your system. RAM is crucial for multitasking and running applications smoothly.
    • Device ID and Product ID: Unique identifiers for your specific device and Windows installation.
    • System type: Indicates if your operating system is 32-bit or 64-bit. Most modern PCs are 64-bit.
    • Pen and touch: Information on touch screen and pen support.
    • Windows specification:
      • Edition: (e.g., Windows 11 Home, Windows 10 Pro)
      • Version: The major version number of your Windows operating system.
      • OS Build: A more specific build number, indicating the latest updates.
      • Experience: Details about Windows Feature Experience Pack.

    Method 2: Using the System Information Utility (msinfo32)

    For a more in-depth look, the System Information utility is your go-to tool. This provides a comprehensive overview of your hardware, software, and components.

    Steps:

    1. Open Run dialog:
      • Press Windows key + R on your keyboard.
    2. Type “msinfo32” and press Enter:
      • In the Run dialog box, type msinfo32 and click OK or press Enter.

    What you’ll find here:

    The System Information window is organized into categories.

    • System Summary: This is the default view and provides a wealth of information, including:
      • OS Name: (e.g., Microsoft Windows 11 Home)
      • Version: Specific Windows version.
      • System Manufacturer & Model: Information about your computer’s manufacturer (e.g., Dell, HP, Lenovo) and model name.
      • System Type: (e.g., x64-based PC)
      • Processor: Detailed information about your CPU, including its architecture and number of cores.
      • BIOS Version/Date: The version and date of your BIOS (Basic Input/Output System), which is firmware used to perform hardware initialization during the booting process.
      • SMBIOS Version: System Management BIOS version.
      • Total Physical Memory & Available Physical Memory: Total RAM installed and how much is currently free.
      • Virtual Memory: How much virtual memory (disk space used as RAM) is available.
      • Page File Space: The size of your page file.
    • Hardware Resources: Details about hardware conflicts, DMA channels, forced hardware, I/O, and IRQs. (Advanced users)
    • Components: This section lists detailed information about various hardware components, including:
      • Display: Your graphics card (GPU) details, driver versions, and display modes. The GPU is a specialized electronic circuit designed to rapidly manipulate and alter memory to accelerate the creation of images in a frame buffer for output to a display device.
      • Sound Devices: Audio chipsets and drivers.
      • Network: Network adapters (Wi-Fi, Ethernet).
      • Storage: Details about your hard drives (HDD – Hard Disk Drive, SSD – Solid State Drive), partitions, and free space. An HDD is a traditional storage device that uses rapidly spinning platters, while an SSD is a faster, more modern storage device that uses flash memory.
      • USB: Connected USB devices.
    • Software Environment: Information about running tasks, loaded modules, services, program groups, startup programs, and error reporting.

    You can also use the search bar at the top of the System Information window to quickly find specific details.

    Method 3: Using the DirectX Diagnostic Tool (dxdiag)

    The DirectX Diagnostic Tool is especially useful for gamers and those troubleshooting display or sound issues. It provides detailed information about your graphics and sound hardware.

    Steps:

    1. Open Run dialog:
      • Press Windows key + R.
    2. Type “dxdiag” and press Enter:
      • In the Run dialog box, type dxdiag and click OK or press Enter.
    3. Confirm digital signature (if prompted):
      • Click Yes if prompted to check if your drivers are digitally signed.

    What you’ll find here:

    The DirectX Diagnostic Tool opens with several tabs:

    • System Tab: Similar to the System Information utility, this tab provides a summary of your operating system, CPU, RAM, BIOS, and DirectX version. DirectX is a collection of APIs (Application Programming Interfaces) for handling tasks related to multimedia, especially game programming and video, on Microsoft platforms.
    • Display Tab(s): If you have multiple monitors or integrated and dedicated graphics, you’ll see separate tabs for each. This is where you’ll find crucial GPU information:
      • Name: (e.g., NVIDIA GeForce RTX 3080, Intel Iris Xe Graphics)
      • Manufacturer: (e.g., NVIDIA, Intel, AMD)
      • Chip Type: Specific GPU model.
      • Display Memory (VRAM): The amount of dedicated video RAM on your graphics card.
      • Driver Version and Date: Important for troubleshooting graphics issues.
      • Monitor details: Resolution and refresh rate.
    • Sound Tab(s): Details about your sound devices and drivers.
    • Input Tab: Information about your connected input devices (keyboard, mouse, game controllers).

    You can also click the Save All Information… button to save a detailed report as a text file for sharing or later review.

    Method 4: Using Command Prompt (CMD)

    For those who prefer command-line interfaces, or if you’re troubleshooting a system where the graphical interface isn’t fully functional, Command Prompt offers a powerful way to retrieve system information.

    Steps:

    1. Open Command Prompt:
      • Click the Start button.
      • Type cmd in the search bar.
      • Click on “Command Prompt” or right-click and select “Run as administrator” (recommended for full access).

    Commands to use:

    • systeminfo: This command provides a very comprehensive list of system information, including OS configuration, hardware details, and network information.
      • Type systeminfo and press Enter.
      • This output can be quite long, so you might need to scroll up to see all the details.
    • wmic cpu get Name,NumberOfCores,NumberOfLogicalProcessors: To get specific CPU details.
      • Type wmic cpu get Name,NumberOfCores,NumberOfLogicalProcessors and press Enter.
      • This will show your CPU name, the number of physical cores, and the number of logical processors (threads).
    • wmic computersystem get model,name,manufacturer,systemtype: To get basic system details.
      • Type wmic computersystem get model,name,manufacturer,systemtype and press Enter.
    • wmic os get Caption,CSDVersion,OSArchitecture,Version: To get operating system details.
      • Type wmic os get Caption,CSDVersion,OSArchitecture,Version and press Enter.
    • wmic memorychip get Capacity,DeviceLocator,FormFactor,Speed: To get RAM details.
      • Type wmic memorychip get Capacity,DeviceLocator,FormFactor,Speed and press **Enter`.
      • Capacity will be in bytes, which you can convert to GB (1 GB = 1,073,741,824 bytes).

    Method 5: Using Task Manager

    While primarily used for monitoring running processes and performance, Task Manager also offers a quick glance at your CPU, RAM, Disk, and GPU usage and basic details.

    Steps:

    1. Open Task Manager:
      • Press Ctrl + Shift + Esc.
      • Alternatively, right-click on an empty space on the taskbar and select “Task Manager.”
    2. Go to the Performance tab:
      • In the Task Manager window, click on the Performance tab.

    What you’ll find here:

    The Performance tab displays real-time graphs and basic information for:

    • CPU: Shows the CPU model name, speed, number of cores, and logical processors.
    • Memory: Displays total RAM, speed, and how much is in use.
    • Disk: Shows your storage drives (HDD/SSD) and their activity.
    • GPU: Displays your graphics card(s), dedicated memory, and current usage. This is particularly useful for seeing which GPU is being utilized.

    Entity Definitions and Background Information

    • CPU (Central Processing Unit): Often called the “brain” of the computer, the CPU is responsible for executing instructions and performing calculations. Major manufacturers include Intel and AMD. Its performance significantly impacts the overall speed of your PC.
    • RAM (Random Access Memory): A form of computer memory that can be read and changed in any order, typically used to store working data and machine code. More RAM generally means your computer can handle more tasks and applications simultaneously without slowing down.
    • OS (Operating System): The software that manages computer hardware and software resources and provides common services for computer programs. Examples include Windows, macOS, and Linux.
    • GPU (Graphics Processing Unit): A specialized electronic circuit designed to rapidly manipulate and alter memory to accelerate the creation of images in a frame buffer for output to a display device. Essential for gaming, video editing, and other graphically intensive tasks. NVIDIA and AMD are the leading manufacturers.
    • BIOS (Basic Input/Output System): Firmware used to perform hardware initialization during the booting process (power-on startup) and to provide runtime services for operating systems and programs. It’s the first software your PC runs when you turn it on.
    • HDD (Hard Disk Drive): A traditional electro-mechanical data storage device that stores and retrieves digital data using rapidly rotating platters coated with magnetic material. Generally slower but cheaper per gigabyte than SSDs.
    • SSD (Solid State Drive): A solid-state storage device that uses integrated circuit assemblies as memory to store data persistently. Much faster, more durable, and more expensive per gigabyte than HDDs.
    • DirectX: A collection of application programming interfaces (APIs) for handling tasks related to multimedia, especially game programming and video, on Microsoft platforms. It allows games and multimedia applications to communicate directly with your hardware.

    Conclusion

    Windows offers a variety of tools to check your system information, catering to different levels of detail and user preference. From the quick overview in Settings to the comprehensive data in System Information or the specialized details from DirectX Diagnostic Tool, you have multiple avenues to understand your PC’s inner workings. Knowing these methods empowers you to troubleshoot, upgrade, and optimize your Windows experience effectively.

    Frequently Asked Questions (FAQ)

    Q1: What is the easiest way to check my computer’s specs?

    The easiest way for most users is to go to Settings > System > About. This provides a good overview of your CPU, RAM, Windows version, and system type.

    Q2: How can I find out if my Windows is 32-bit or 64-bit?

    You can check this in Settings > System > About under “System type.” Alternatively, open the System Information utility (msinfo32) and look at “System Type” in the System Summary.

    Q3: Where can I see my graphics card information?

    The best place to find detailed graphics card information is the DirectX Diagnostic Tool (dxdiag). Open it, and go to the “Display” tab(s). You can also see basic information in Task Manager’s Performance tab under “GPU.”

    Q4: My computer is running slow. What system information should I check first?

    If your computer is slow, first check your RAM usage in Task Manager’s Performance tab. If it’s consistently high, you might need more RAM. Also, check your CPU usage and the type of storage drive (an SSD will be much faster than an HDD).

    Q5: How do I find my BIOS version and date?

    You can find your BIOS version and date in the System Information utility (msinfo32) under the “System Summary” section.

    Q6: Can I check my system information without logging into Windows?

    Generally, no. Most of these methods require the Windows operating system to be running. However, some advanced methods (like checking BIOS during startup or using bootable diagnostic tools) can provide limited hardware information before Windows loads.

    Q7: What is the difference between physical memory and virtual memory?

    Physical memory refers to your installed RAM. Virtual memory is a combination of RAM and space on your hard drive (the page file) that acts as additional memory when your RAM is full. While virtual memory helps prevent crashes, it is significantly slower than physical RAM.

    Q8: Why would I use Command Prompt instead of Settings to check system info?

    Command Prompt is useful for scripting, remote administration, or when the graphical interface is not accessible. It can also provide specific data points very quickly without navigating through menus.

  • How to Use Samsung Tablet as a Second Monitor

    How to Use Samsung Tablet as a Second Monitor

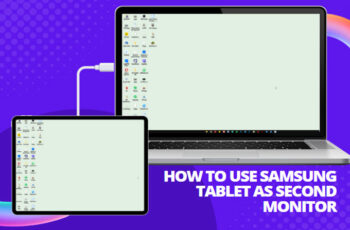
    Ever wish you had a second screen to spread out your work or keep an eye on multiple things at once? If you own a Samsung tablet, you’re in luck. Many newer Galaxy tablets can double as a portable second monitor for your Windows PC—perfect for boosting productivity on the go or at your desk.

    This guide walks you through all the best ways to turn your Samsung tablet into a second screen, whether you’re going wireless with built-in tools or exploring reliable third-party apps.

    Why Use a Samsung Tablet as a Second Display?

    There are a few big perks to this kind of setup:

    • Portability: You get dual-screen productivity, even when you’re away from your usual setup.
    • Budget-Friendly: No need to buy another monitor—just repurpose what you already have.
    • More Space to Work: Great for writing, editing, designing, or managing multiple windows at once.
    • Touch Input: Some methods even support touch, including S Pen functionality.

    Before starting, make sure both your tablet and computer are fully updated for the best compatibility.

    Method 1: Use Samsung’s Built-in “Second Screen” Feature (Best for Newer Tablets)

    If you have a newer Samsung tablet—like the Galaxy Tab S7 or later—Samsung includes a built-in feature called Second Screen that makes this process super simple.

    What You’ll Need:

    • Tablet: Galaxy Tab S7/S7+/S7 FE, S8/S8+/S8 Ultra, S9 series, or newer
    • One UI: Version 3.1 or higher
    • PC: Windows 10 (version 2004+) or Windows 11 with Miracast support
    • Wi-Fi: Both devices on the same network

    On Your Samsung Tablet:

    1. Swipe down twice from the top to open Quick Settings.
    2. Tap Second Screen.
    3. Choose a mode:
      • Gaming & Video – smoother motion
      • Drawing & Gaming – better touch responsiveness (especially for S Pen)
    4. The tablet will now wait for a connection.

    On Your Windows PC:

    1. Press Windows key + K to open the Cast menu.
    2. Select your tablet from the list (look for something like Galaxy Tab S8).
    3. Accept the connection on your tablet by tapping Start now or Allow.

    You’re connected!

    To Tweak Your Display Settings:

    • Right-click your desktop > Display settings
    • Arrange the screen layout by dragging the monitor icons
    • Set display mode to Extend or Duplicate
    • Adjust resolution or orientation as needed

    Troubleshooting Tips:

    • Can’t see your tablet? Double-check both devices are on the same Wi-Fi and your PC supports Miracast (use dxdiag to verify).
    • Laggy performance? A stable Wi-Fi connection is key—limit background downloads or interference.

    Method 2: Use Third-Party Apps (For Older Tablets or Wired Setups)

    If your Samsung tablet doesn’t support Second Screen, or if you prefer a wired option, there are some excellent apps you can try.

    Option A: Duet Display (Wired & Wireless, Paid)

    Duet Display is a polished, cross-platform app that works well with both Windows and macOS.

    What You Need:

    • Duet app installed on your tablet (from Google Play – it’s a paid app)
    • Duet software installed on your PC/Mac (download from duetdisplay.com)
    • USB cable (for best performance) or Wi-Fi for wireless mode

    How It Works:

    1. Install and open the app on your tablet and desktop.
    2. Connect the tablet to your computer via USB or connect over Wi-Fi (same network).
    3. The screen should automatically extend to the tablet.
    4. Adjust display settings through your computer as needed.

    Pros:

    • Very low latency, especially when wired
    • Supports touch (and even Apple Pencil or S Pen input)
    • Cross-platform (works with both Windows and macOS)

    Option B: Spacedesk (Wireless Only, Free)

    Spacedesk is a free, simple solution that works great if you’re okay with using Wi-Fi only.

    What You Need:

    • Spacedesk server on your PC (download from spacedesk.net)
    • Spacedesk app on your tablet (from Google Play)
    • Same Wi-Fi network for both devices

    Setup Steps:

    1. Launch Spacedesk on your PC and tablet.
    2. The tablet app should auto-detect your computer.
    3. Tap your PC’s name and the connection begins.
    4. Configure display settings in Windows just like a normal second monitor.

    Pros:

    • Completely free
    • Easy to set up

    Cons:

    • Wi-Fi only, so you may experience more input lag
    • Windows only (no macOS support)

    Option C: SuperDisplay (Wired or Wireless, Paid After Trial)

    SuperDisplay is great for artists or anyone using a stylus. It offers impressive touch and S Pen support.

    What You Need:

    • SuperDisplay app (free trial on Google Play)
    • SuperDisplay driver on your PC (from superdisplay.app)
    • USB cable (recommended) or Wi-Fi

    Steps:

    1. Enable USB Debugging on your tablet:
      • Go to Settings > About tablet > Software info, tap Build number 7 times to unlock Developer Mode.
      • Then, go to Settings > Developer options > Enable USB Debugging
    2. Connect your tablet via USB or Wi-Fi.
    3. Open SuperDisplay on both devices.
    4. Follow prompts to complete the connection and adjust settings.

    Pros:

    • Smooth performance over USB
    • S Pen works well for drawing and note-taking
    • One-time purchase after trial

    Final Setup Tips

    Once your tablet is acting as a second display:

    • Rearrange Displays: In Windows display settings, position your screens so mouse movement matches your setup.
    • Extend vs Duplicate: Extend gives you more screen space. Duplicate mirrors your primary display.
    • Adjust Resolution: Lower the resolution slightly on your tablet if things look too tiny or if Wi-Fi is laggy.
    • Keep Your Tablet Plugged In: Using it as a monitor can drain battery fast.
    • Use a Stand: A tablet stand or case with a built-in kickstand makes a huge difference in usability.

    Wrap-Up

    Whether you’re a student, a remote worker, or just someone who enjoys extra screen space, turning your Samsung tablet into a second monitor is surprisingly simple. With a little setup, you can extend your workspace and stay more productive—without spending anything extra on hardware.

  • How to Update Outdated Drivers in Windows

    How to Update Outdated Drivers in Windows

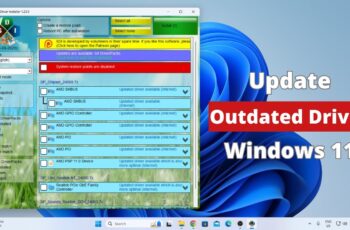
    Are you experiencing flickering on your screen, a choppy internet connection, or other strange hardware issues? The culprit might be outdated drivers. Drivers are essential pieces of software that allow Windows to communicate with the hardware components in your PC, like your graphics card, printer, and Wi-Fi adapter. Keeping them updated can fix bugs, improve performance, and even patch security holes.

    However, the world of driver updates can be confusing. This guide will walk you through the safest and most effective ways to update outdated drivers in Windows, from the easiest automatic methods to the more precise manual approach. I’ve been through this process countless times, and I’ve learned that taking the right approach is key to avoiding problems.

    First, a Key Principle: If It Isn’t Broken, Don’t Fix It

    Before you start, it’s important to understand this: you do not need to obsessively update every single driver on your system. For most components, the drivers provided by Windows are perfectly fine and stable. The “if it ain’t broke, don’t fix it” rule generally applies.

    The major exception to this rule is for your graphics drivers (from NVIDIA, AMD, or Intel). Gamers and creative professionals especially will benefit from keeping these updated to ensure the best performance and compatibility with new games and applications.

    With that in mind, here is how to properly update your drivers.

    Method 1: The Safest and Easiest Way – Windows Update

    For most users, this is the only method you will ever need. Microsoft tests and certifies drivers delivered through Windows Update, making it the most reliable source for most hardware.

    Step 1: Open Windows Update

    • Click on the Start Menu, go to Settings (the gear icon), and select Update & Security (on Windows 10) or Windows Update (on Windows 11).
    • Click Check for updates. Windows will automatically download and install any critical updates, which may include drivers.

    Step 2: Check for Optional Updates

    This is where many important but non-critical driver updates hide. I’ve often found that a specific hardware issue was solved by a driver waiting in this very section.

    • On the Windows Update screen, look for a link that says View optional updates or Advanced options > Optional updates.
    • Click on it, and then expand the Driver updates section.
    • If you see drivers listed for components you’re having issues with, check the box next to them and click Download & install.

    If there are no driver updates listed here, Windows believes your current drivers are the best fit for your system. For most components, you can stop here.

    Method 2: The Manual Method (Best for Graphics Drivers)

    For core components like your graphics card or for when a specific problem isn’t fixed by Windows Update, going directly to the source is the best approach.

    Step 1: Identify Your Hardware

    You need to know exactly what component you’re updating. The easiest way to do this is with the Device Manager.

    • Right-click on the Start Menu and select Device Manager from the list.
    • In the Device Manager window, expand the category for the hardware you want to update. For a graphics card, for example, expand Display adapters.
    • Note down the exact name of the device (e.g., “NVIDIA GeForce RTX 4070” or “Intel Wi-Fi 6 AX201”).

    Step 2: Visit the Manufacturer’s Website

    Do not use a third-party website to download drivers. Go directly to the official source.

    • For Graphics Drivers:
      • NVIDIA
      • AMD
      • Intel
    • For Other Components (Wi-Fi, Audio, etc.): Go to the support website for your laptop or motherboard manufacturer (e.g., Dell, HP, ASUS, MSI). They provide drivers specifically tested for your system.

    Step 3: Download and Install the Driver

    • On the support website, navigate to the drivers or downloads section. Use the device name you noted down to find the latest correct driver for your version of Windows.
    • Download the installer (it’s usually a .exe file).
    • Double-click the downloaded file and follow the on-screen instructions to install the driver. Your screen may flicker or go black for a moment during a graphics driver installation—this is normal.
    • Restart your computer after the installation is complete to ensure the driver is loaded correctly.

    Method 3: Using Device Manager to Update

    You can also prompt Windows to search for a new driver directly from the Device Manager.

    1. Open Device Manager as described before.
    2. Right-click on the hardware you want to update and select Update driver.
    3. You will be given two options:
      • Search automatically for drivers: This does a similar job to Windows Update. It’s quick but may not find the absolute newest driver.
      • Browse my computer for drivers: Use this option if you have already downloaded the driver files from the manufacturer’s website (as in Method 2) but need to install them manually.

    A Word of Warning: Third-Party Driver Updater Software

    You will see many ads for programs that promise to update outdated drivers on your PC automatically with one click. My strong advice is to avoid them.

    • The Risks: These programs are often bundled with malware or adware. They can also install the wrong or unstable drivers, leading to system crashes and other problems. I’ve seen more systems broken by these “updaters” than fixed by them.
    • The Reality: Windows Update and direct manufacturer downloads are safer, more reliable, and free. There is no need to introduce the risk of a third-party utility for a task you can easily manage yourself.

    By following these methods, you can ensure your hardware runs smoothly and efficiently without putting your system at risk. Stick with Windows Update for general maintenance and go directly to the manufacturer for specific needs like graphics drivers.

  • How to Use RCS Messaging on Samsung Galaxy

    How to Use RCS Messaging on Samsung Galaxy

    RCS (Rich Communication Services) messaging is the modern evolution of SMS, offering a more engaging and feature-rich texting experience. Think of it as iMessage for Android, bringing features like read receipts, typing indicators, high-quality photo and video sharing, and group chat enhancements directly into your default messaging app. If you own a Samsung Galaxy device, you’ll likely be using Google Messages as your default, which is the primary app for RCS messaging.

    Why Use RCS Messaging?

    RCS messaging offers significant upgrades over traditional SMS/MMS:

    • Read Receipts: See when your messages have been delivered and read.
    • Typing Indicators: Know when the other person is typing a reply.
    • High-Quality Media: Send and receive crisp, uncompressed photos and videos, unlike the heavily compressed media sent via MMS.
    • Larger Group Chats: Enjoy more robust group messaging with features similar to popular chat apps.
    • Richer Features: Potential for file sharing, location sharing, and more interactive experiences.
    • Wi-Fi Messaging: Send messages over Wi-Fi, which can save on cellular data and work in areas with poor signal.

    Important Prerequisites for RCS Messaging

    For RCS messaging to work, both you and the person you are texting must:

    • Have a Samsung Galaxy device (or any Android phone) that supports RCS. Most modern Android phones do.
    • Be using an RCS-enabled messaging app, primarily Google Messages. While Samsung’s stock Messages app used to support RCS, Google Messages is now the universally recommended and often pre-installed app for RCS on Samsung.
    • Have RCS Chat features enabled in their messaging app settings.
    • Be connected to the internet (Wi-Fi or mobile data).
    • Your mobile carrier must support RCS. Most major carriers do.

    How to Enable and Use RCS Messaging on Your Samsung Galaxy

    The process involves ensuring you’re using Google Messages and then activating the Chat features.

    Step 1: Set Google Messages as Your Default Messaging App

    Many new Samsung Galaxy phones come with Google Messages pre-installed and set as default. If not, you’ll need to install it and set it as your primary messaging app.

    1. Download Google Messages: If you don’t have it, open the Google Play Store, search for “Google Messages,” and install it.
    2. Open Settings: From your home screen, swipe down from the top to open the Quick Settings panel, then tap the Gear icon (Settings).
    3. Navigate to Apps: Scroll down and tap on Apps.
    4. Choose Default Apps: Tap on Choose default apps (or Default apps).
    5. Set SMS App: Tap on SMS app.
    6. Select Messages: Choose “Messages” (which will be the Google Messages app, identified by its colorful icon) from the list. Confirm if prompted.

    Step 2: Enable Chat Features in Google Messages

    Once Google Messages is your default, you need to turn on Chat features.

    1. Open Google Messages: Launch the Messages app from your home screen or app drawer.
    2. Access Settings:
      • Tap on your profile icon in the top right corner.
      • Tap Messages settings.
    3. Go to Chat Features: Tap on Chat features.
    4. Turn On Chat Features:
      • You will see a toggle for Enable chat features.” Turn this ON.
      • If you see “Connecting…” or “Setting up…”, your phone is trying to connect to Google’s RCS servers. This might take a few moments.
      • Once connected, the status will change to Connected.” This means RCS messaging is now active for your number.

    Step 3: Start an RCS Conversation

    Once Chat features are enabled and “Connected,” you can start enjoying the benefits of RCS messaging.

    1. Open Google Messages: Go back to the main conversation list.
    2. Start a New Message: Tap the “Start chat” or “+” icon (depending on your Messages app version) to compose a new message.
    3. Select a Contact: Choose a contact that also has RCS Chat features enabled.
      • How to know if a contact has RCS: In the compose message field, you’ll see “Chat message” (or “RCS message”) instead of “Text message” or “SMS message.” The send button might also be a darker blue. If it says “Text message,” they don’t have RCS enabled, and your message will send as a regular SMS/MMS.
    4. Send Your Message: Type your message and tap the send button.

    Step 4: Utilize RCS Features

    In an active RCS conversation, you’ll notice:

    • Read Receipts: A small “Read” notification will appear under your sent message when the recipient has viewed it.
    • Typing Indicators: A small animation or text (e.g., “Typing…”) will appear at the top of the conversation when the other person is writing.
    • High-Quality Media: When you attach photos or videos, they will send in much higher quality than traditional MMS. Tap the “+” icon next to the message field to attach media.
    • Reactions: Long-press on a message you received to react with an emoji.
    • Replies: Long-press on a message to directly reply to it, creating a threaded conversation.

    Troubleshooting Common RCS Issues

    • “Chat features unavailable for this device/number”:
      • Internet Connection: Ensure you have a stable Wi-Fi or mobile data connection.
      • Carrier Support: Verify your mobile carrier supports RCS messaging.
      • Google Messages Version: Make sure your Google Messages app is updated to the latest version.
      • Verify Phone Number: In Messages settings > Chat features, ensure your correct phone number is listed and verified. Sometimes, toggling Chat features OFF and then ON again can re-initiate the verification process.
    • Messages Sending as SMS/MMS:
      • Recipient’s Status: The most common reason is that the recipient does not have RCS Chat features enabled on their end or isn’t using an RCS-compatible app.
      • Poor Internet Connection: If your internet connection is weak, messages might revert to SMS/MMS to ensure delivery.
      • Toggle Off Chat Features for Specific Contacts: In a chat with a specific contact, you can sometimes long-press the send button to switch to SMS/MMS if RCS is having issues.
    • Messages Not Being Received:
      • Clear Cache: Go to Settings > Apps > Messages > Storage > Clear cache and then Clear data. This often resolves minor glitches. (Note: Clearing data will not delete your messages, but it may require you to re-enable chat features).
      • Restart Phone: A simple restart can resolve temporary network or app issues.

    By following these steps, you can confidently enable and use RCS messaging on your Samsung Galaxy phone, transforming your everyday texting into a richer, more interactive experience that aligns with modern communication standards.

  • How to Increase Call Volume on Samsung Phone

    How to Increase Call Volume on Samsung Phone

    Struggling to hear your calls clearly on your Samsung Galaxy? Whether it’s a regular call, on speakerphone, or through headphones, low call volume can really get in the way. The good news is, there are plenty of ways to boost that volume—some are quick fixes, while others dig a little deeper into your phone’s settings. Let’s walk through them all.

    1. Adjust Volume During a Call (Start Here)

    Often overlooked, this is the simplest fix.

    • When you’re on a call, just press the Volume Up button on the side of your phone.
    • A volume slider will appear—keep pressing until it hits max.
    • Note: On speakerphone, the volume buttons adjust speaker volume; with Bluetooth headphones, they control Bluetooth volume.
    1. Check and Adjust Media Volume (For Speakerphone or Bluetooth)

    Sometimes the “Media” or “System” volume affects how loud calls sound, especially with speaker or Bluetooth audio.

    • Open Settings > Sounds and vibration > Volume.
    • Make sure the Media (and possibly System) volume sliders are turned up.
    1. Enable or Adjust “Extra Volume” and Call Sound Quality Settings

    Samsung often includes features to enhance call audio.

    • Open your Phone app, tap the three-dot menu > Settings.
    • Look for options like Other call settings, Call sound quality, or Extra volume.
    • If you see Extra volume, toggle it on.
    • Explore Call sound quality or Equalizer presets—sometimes choosing “Clear” or tweaking bass/treble makes voices pop.
    • Try Adapt Sound under Settings > Sounds and vibration > Sound quality and effects. It lets you personalize audio based on your hearing and can noticeably improve call clarity.
    1. Clean the Earpiece and Speaker Grilles

    Dust and lint can muffle sound over time.

    • Examine your phone’s earpiece (top grille) and speaker (bottom).
    • Use a soft brush or compressed air carefully to clear debris.
    • Avoid poking with sharp objects that might damage the mesh.
    1. Remove Phone Case or Screen Protector

    Sometimes bulky cases or screen protectors block sound.

    • Take off your case.
    • Make a test call to see if volume improves.
    • Check if your screen protector covers the earpiece and adjust if needed.
    1. Restart Your Phone

    Simple but effective.

    • Hold the Power button, tap Restart.
    • Once rebooted, try a call again.
    1. Update Your Phone’s Software

    Keeping your software current can fix bugs affecting sound.

    • Go to Settings > Software update.
    • Check for and install any available updates.
    1. Clear Cache Partition (Advanced)

    This can fix system glitches without deleting your data.

    • Turn off your phone.
    • Boot into Recovery Mode: Hold Volume Up + Power/Side button until Samsung logo appears.
    • Navigate with volume buttons to Wipe cache partition, select with Power button.
    • Confirm and reboot.
    1. Consider External Factors

    Sometimes it’s not your phone.

    • Poor network signal can lower call quality.
    • The caller’s microphone might be faulty or muted.
    • Persistent hearing difficulty? Consider seeing a healthcare professional.

    By working through these tips, you should find your Samsung phone’s call volume clearer and louder, making conversations much easier.

  • How to Backup Samsung Phone Before Factory Reset

    How to Backup Samsung Phone Before Factory Reset

    A factory reset can be a lifesaver for fixing stubborn software glitches, prepping your phone for resale or trade-in, or just giving it a clean slate. But there’s a catch: it erases everything. We’re talking photos, videos, messages, contacts, app data—gone. That’s why backing up your Samsung phone beforehand isn’t just a good idea; it’s essential.

    Why Back Up Before a Factory Reset? It only takes one reset to lose years of memories or crucial info. A proper backup lets you:

    • Restore your data: Contacts, photos, messages, and more.
    • Save app data: Like your game progress and custom app settings.
    • Move data to a new device: Transitioning is smoother.
    • Keep your setup: Home screen layout, preferences, etc.

    How to Back Up Your Samsung Phone Samsung provides several backup methods. For best results, use a mix of them.

    Method 1: Samsung Cloud for Core Data

    1. Open Settings > Accounts and backup.
    2. Under “Samsung Cloud,” tap Back up data.
    3. Sign in if prompted.
    4. Select the items to back up (or tap “Select all”).
    5. Tap Back up now.
    6. Wait for confirmation. Use Wi-Fi and keep your phone charged.

    Method 2: Google Services for Media & Files

    2.1 Google Photos (Photos & Videos)

    1. Open Google Photos.
    2. Tap your profile picture > Photos settings > Backup & sync.
    3. Toggle Backup & sync ON.
    4. Choose Storage saver or Original quality.
    5. Enable backup for other folders (like WhatsApp or Screenshots).

    2.2 Google Drive (Documents & Files)

    1. Open My Files app.
    2. Find the files or folders to back up.
    3. Long-press to select, then tap Share.
    4. Choose Drive, select destination folder, and tap Save.

    Method 3: Google Backup (Android-Wide)

    1. Go to Settings > Accounts and backup.
    2. Under Google Drive, tap Back up data.
    3. Confirm the correct Google account.
    4. Make sure Back up to Google Drive is on.
    5. Tap Back up now.

    Method 4: Samsung Smart Switch (PC or USB Backup)

    4.1 Back Up to PC

    1. Download Smart Switch from Samsung’s website.
    2. Install and open it.
    3. Connect your phone via USB.
    4. Grant permissions on your phone.
    5. Click Backup on your PC.
    6. Choose what to back up and confirm.
    7. Wait for completion and verify the backup file.

    4.2 Back Up to USB Drive (OTG)

    1. Connect a USB OTG adapter and USB drive.
    2. Open Smart Switch app on your phone.
    3. Tap External storage > Back up.
    4. Choose data and start the backup.

    Method 5: Manual Backups for Extras

    • Contacts: Sync via Settings > Accounts > Google > Account sync > Contacts.
    • WhatsApp: Open WhatsApp > Settings > Chats > Chat backup > Back Up.
    • SMS: Use apps like “SMS Backup & Restore.”

    Before You Reset: Final Checklist

    1. Verify Backups: Double-check Google Drive, Photos, Samsung Cloud, Smart Switch.
    2. Remove Google Account:
      • Settings > Accounts > Google > Remove.
    3. Remove Samsung Account:
      • Settings > Accounts > Samsung > Remove.
    4. Charge Up: At least 50% battery or plug in.

    Once you’ve covered all these steps, you can perform your factory reset with confidence, knowing your personal data is safe and ready to come back when you need it.

  • How to Enable Dark Mode on Samsung Galaxy Phones

    How to Enable Dark Mode on Samsung Galaxy Phones

    Dark Mode, sometimes called Night Mode or Dark Theme, is more than a stylish look—it’s a practical feature that enhances comfort and can extend your battery life. If you’re using a Samsung Galaxy phone, enabling Dark Mode is quick and flexible. Here’s how to get it working, plus how to customize it to suit your lifestyle.

    Why Use Dark Mode?

    • Easier on the Eyes: Especially in low light.
    • Battery Friendly: On AMOLED/OLED screens, black pixels are essentially off.
    • Sleek Aesthetic: Many users find it visually appealing.
    • Less Glare: Reduces eye fatigue in dark environments.

    Requirements

    • Samsung Galaxy phone with Android 10 (One UI 2.0) or newer.
    • Older models might not have full system-wide Dark Mode.

    Three Ways to Enable Dark Mode

    Method 1: Quick Settings Panel

    1. Swipe down twice from the top of your screen.
    2. Find and tap the “Dark mode” toggle (moon icon).
    3. Done—you’re in Dark Mode.

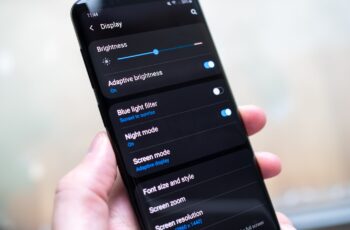
    Method 2: Display Settings

    1. Open Settings.
    2. Tap Display.
    3. Choose Dark.
    4. Optional: Tap Dark mode settings to schedule it.
      • Sunset to sunrise: Uses your location to automate switching.
      • Custom schedule: Set your own start and end times.

    Method 3: Bixby Routines (Advanced Automation)

    1. Go to Settings > Advanced features > Bixby Routines.
    2. Tap “+” to create a new routine.
    3. Set a trigger like “Time period” or “App opened.”
    4. Add an action: Display > Dark mode > On.
    5. Repeat with a second routine to turn it back off.

    Troubleshooting & Tips

    • App Compatibility: Some apps won’t follow system settings.
    • Force Dark Mode: In Developer Options, enable “Override force-dark.” (Use with caution.)
    • One UI Version: Ensure your software is up to date.
    • AMOLED Advantage: Battery savings are most effective on AMOLED screens.
    • Wallpaper: The phone might adjust brightness and colors of your wallpaper for consistency.

    My Experience

    I set Dark Mode to auto-enable at sunset, and honestly, I forget it’s even a setting—it just works. Late-night screen time is way easier on my eyes now, and my battery seems to thank me too.

    Wrap-Up

    Whether you use it for comfort, looks, or battery life, enabling Dark Mode on your Samsung Galaxy phone is a small change with big benefits. With several easy activation options and thoughtful scheduling features, it fits smoothly into any routine.

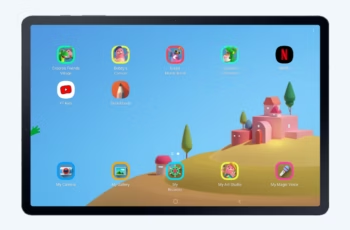
  • How to Use Samsung Kids Mode Safely

    How to Use Samsung Kids Mode Safely

    Parenting in the digital age? Yeah, it comes with its own set of headaches. One big one: figuring out how to keep your child safe online without hovering over them constantly. If your kid has access to a Samsung device, Samsung Kids Mode can help you strike that balance between freedom and safety. But just switching it on isn’t enough. To really make it work, you’ve got to know how to customize and monitor it properly.

    What Is Samsung Kids Mode, Exactly?

    Samsung Kids Mode is essentially a digital playground that’s fenced in. Available on most Samsung Galaxy phones and tablets (and downloadable on others), it offers a child-friendly interface packed with educational games, creative apps, and a safe web browser. It also locks out access to your main phone features—so no more surprise phone calls to your boss or mystery app purchases.

    Step 1: Getting Started with Samsung Kids

    How to Launch It:

    • From the Quick Panel: Swipe down from the top of your screen twice. Look for the “Kids” icon and tap it.
    • From the App Drawer: Can’t find it above? Swipe up on the home screen and search for “Samsung Kids.”

    Initial Setup:

    • The first launch may prompt a quick download. Nothing major, just essential files.
    • You’ll then be asked to set a PIN or enable biometrics. This PIN keeps your child inside the safe zone. Make it something they won’t guess.

    Step 2: Customizing the Experience

    This is where the safety part kicks in.

    Parental Control Access:

    • Tap the three-dot menu on the Samsung Kids home screen.
    • Choose “Parental control” and enter your PIN or fingerprint.

    Control What They Can Use:

    • Allowed Apps: Toggle off anything unnecessary or inappropriate. Add new apps from your phone with the + icon—think YouTube Kids, not the regular YouTube app.
    • Screen Time Limits: Go to “Daily play time.” You can set limits by day and even customize weekday vs. weekend usage.
    • Media Access: Under “Allowed content,” pick which photos and videos they can see. Don’t just give full gallery access.
    • Contacts: You can allow calls to specific people only—grandparents, maybe, but not your entire contacts list.
    • Kids Store Settings: Downloads from the Kids Store need your PIN. Still, check app permissions before giving the green light.

    Step 3: Monitor and Adjust

    Setting it up is only half the battle. Regular check-ins help keep things on track.

    Check Their Usage:

    • Under “Activity report” or “Usage time,” see what they’re using and how often. If they’re spending too much time on one app, maybe adjust the limits.

    Review Content Periodically:

    • Kids grow fast. What’s age-appropriate today might not be next month. Revisit the “Allowed applications” list now and then.

    Talk to Your Child:

    • Technology can’t replace conversation. Teach your child about online safety, and let them know they can come to you if something feels off.

    Step 4: Exiting or Turning It Off

    To Exit Temporarily:

    • Tap the three-dot menu > “Close Samsung Kids.”
    • Enter your PIN or biometric data.

    To Remove It Altogether:

    • From the Apps screen, long-press “Samsung Kids” and tap Uninstall. Or go to Settings > Apps > Samsung Kids and select Disable/Uninstall.

    Extra Safety Tips

    • Use a Strong PIN: It’s your digital gatekeeper. Don’t use birthdays or easy guesses.
    • Vet Every App: Even apps in the Kids Store deserve a second look.
    • Keep Apps Updated: Updates often fix bugs or tighten security.
    • Teach Digital Responsibility: Empower your child with basic online smarts.
    • Review Link Access: Some apps may still attempt to link out. Check permissions.
    • Add Router-Level Controls: Kids Mode limits the device, not your network. Router-level parental controls add a second layer.

    Used right, Samsung Kids Mode gives your child a safe place to explore—and gives you a bit of peace of mind. It’s not perfect, but with a bit of effort, it can be a solid foundation for responsible tech use.

  • How to Use Samsung Notes Across Devices

    How to Use Samsung Notes Across Devices

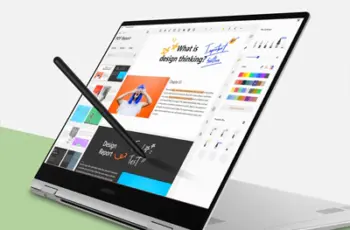
    Samsung Notes is a powerful and versatile app for taking and organizing notes. I’ve used it regularly across my Galaxy smartphone, tablet, and Windows laptop for both work and personal tasks. The ability to sync notes seamlessly across devices is one of its most valuable features—especially when switching between devices on the go.

    This guide explains how to use Samsung Notes across multiple devices—whether you’re using Android, Windows, or a web interface—and offers solutions for common sync and setup issues. Everything is explained in simple, clear steps based on real-world usage and experience.

    What Is Samsung Notes?

    Samsung Notes is Samsung’s proprietary note-taking app, pre-installed on most Galaxy devices. It supports text, handwriting, sketches, PDFs, voice recordings, and even screen-off memos on supported devices like Galaxy Note or Galaxy S Ultra phones.

    While it started as a simple notes app, Samsung Notes has evolved into a cross-platform productivity tool that can sync data via the Samsung Cloud and Microsoft OneNote/Outlook.

    Why Use Samsung Notes Across Devices?

    Syncing Samsung Notes between devices helps you:

    • Access your notes from your phone, tablet, or PC.
    • Back up important content in case of phone loss or damage.
    • Edit documents or memos on a bigger screen (like a tablet or PC).
    • Handwrite notes during meetings and access them later from your laptop.
    • Let’s walk through how to set it all up.

    Step 1: Sign in to Samsung Account on All Devices

    The first and most important step is using the same Samsung Account across all devices.

    On Samsung Galaxy phone/tablet:

    1. Go to Settings > Accounts and backup > Manage accounts.
    2. Tap Add account if not already signed in.
    3. Choose Samsung account and sign in.

    On Windows PC (using Samsung Notes or Samsung Settings app):

    1. Install Samsung Notes from the Microsoft Store (for supported Galaxy Books).
    2. Open the app and sign in with your Samsung account.
    3. Make sure the same account is used across devices.

    Tip: Notes will only sync between devices using the same Samsung account. Double-check for typos or multiple accounts.

    Step 2: Enable Sync in Samsung Notes

    Once you’re logged in, you must turn on syncing.

    On your phone/tablet:

    1. Open the Samsung Notes app.

    2. Tap the three lines (menu icon) in the top-left corner.

    3. Go to Settings.

    4. Tap Sync with Samsung Cloud and toggle it ON.

    5. Under Sync using, choose Wi-Fi only or Wi-Fi and mobile data depending on your preference.

    Samsung Notes will begin syncing automatically in the background. Sync includes text, drawings, audio, and PDF annotations.

    Step 3: Access Samsung Notes on Another Galaxy Device

    When you pick up your second Galaxy device, like a tablet:

    1. Make sure it’s signed in with the same Samsung account.
    2. Open the Samsung Notes app.
    3. Give it a few moments to sync.
    4. All your notes from the first device will appear.

    If syncing doesn’t begin, swipe down on the main screen of Samsung Notes to trigger a manual refresh.

    Step 4: Use Samsung Notes on Windows Laptop or PC

    Using Samsung Notes on a Windows PC is slightly different and only supported on Samsung Galaxy Book series officially. Here’s how to make it work:

    Option 1: On Supported Samsung Laptops

    1. Open the Microsoft Store.
    2. Search for Samsung Notes and install it.
    3. Launch the app and sign in with your Samsung account.
    4. Your notes will sync automatically.

    Option 2: Using Microsoft OneNote Sync (Cross-platform workaround)

    Samsung allows syncing Samsung Notes with Microsoft OneNote.

    Set Up OneNote Sync:

    1. Open Samsung Notes on your phone.
    2. Go to Settings > Sync to Microsoft OneNote.
    3. Sign in with your Microsoft account.
    4. Choose categories to sync (e.g., All Notes or specific folders).
    5. Sync will occur in the background and content appears in OneNote under Samsung Notes folder.

    This is especially useful for non-Samsung Windows PCs that cannot install the native Samsung Notes app.

    Step 5: View Notes in Outlook or OneNote (Web/Desktop)

    After setting up Microsoft integration, you can view your Samsung Notes:

    • In Outlook for Windows, click Notes > Samsung Notes section.
    • In OneNote online, your synced notes appear under your selected folder.
    • You can access these notes from any PC or tablet with a browser.

    Note that formatting may be limited, and some advanced features like handwritten notes may not display correctly.

    Step 6: Export Notes as PDF or Word (Optional Sharing)

    If you want to send a note to someone without using sync:

    1. Open the note in the Samsung Notes app.
    2. Tap More options (three dots) > Save as file.
    3. Choose from PDF, Word, or image.
    4. Save it locally or share via email/cloud.

    I often use this when sending meeting notes or design sketches to team members who don’t use Samsung Notes.

    Troubleshooting: Samsung Notes Not Syncing?

    Here are some common solutions if Samsung Notes fails to sync:

    1. Check Internet Connection

    • Ensure stable Wi-Fi or mobile data is available on both devices.

    2. Re-Login to Samsung Account

    • Go to Settings > Accounts, sign out and sign back in.

    3. Clear Cache

    • Long-press Samsung Notes > App info > Storage > Clear cache.

    4. Manual Sync

    • In Samsung Notes > Settings > Tap Sync now.

    5. Update the App

    • Go to Galaxy Store and update Samsung Notes to the latest version.

    Limitations You Should Know

    • Samsung Notes does not support full editing on non-Samsung devices unless using OneNote sync.

    • Not all formatting (e.g., handwritten text or screen-off memos) transfers properly through OneNote.

    • Samsung Notes is not available as a standalone web app via browser.

    • Full desktop experience is limited to Galaxy Book laptops with Windows 10 or newer.

    Best Practices for Samsung Notes Across Devices

    From experience, here are a few tips to get the most out of cross-device use:

    • Organize notes using folders—helps sync better and easier to find later.

    • Use tags inside notes to group similar topics.

    • Keep your Samsung Notes app updated on all devices.

    • Enable auto backup to Samsung Cloud for extra safety.

    • When using OneNote sync, keep formatting simple for better compatibility.

    Final Thoughts

    Using Samsung Notes across devices is a reliable way to manage your ideas, to-do lists, and documents, whether you’re on a phone, tablet, or compatible laptop. I use Samsung Notes every day across my Galaxy S22 Ultra, Galaxy Tab S8, and Galaxy Book2 Pro, and the cross-device experience is generally smooth as long as sync is properly configured.

    It’s not perfect—especially if you try using it on a non-Samsung laptop—but with the OneNote sync, Samsung has created a reasonable bridge for wider access. If you stick with Galaxy devices, Samsung Notes becomes a powerful productivity ecosystem.