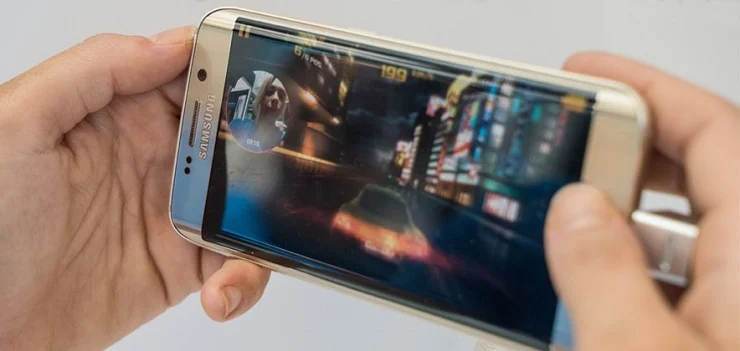
Recording your mobile gameplay on a Samsung phone is straightforward thanks to Samsung’s integrated tools like the Screen Recorder and features within Game Launcher and Game Booster. These options allow you to capture high-quality video of your gaming sessions, complete with audio and even your reactions.
Method 1: Using the Built-in Screen Recorder (Quick Panel)
Modern Samsung phones running recent versions of One UI (Android 10 and above) include a system-wide screen recorder in the Quick Panel. This is ideal for general screen recording, including gameplay.
Step 1: Access the Quick Panel
- Swipe Down: From the top of your screen, swipe down twice to fully expand the Quick Panel. This is the area where you find quick toggles for Wi-Fi, Bluetooth, flashlight, etc.
Step 2: Locate the Screen Recorder Tile
- Find the Icon: Look for an icon labeled “Screen recorder.” It might look like a camera or a video recorder.
- Add if Missing: If you don’t see it, swipe left to check other pages of the Quick Panel. If it’s still missing, tap the plus icon (+) or the three vertical dots and select “Edit buttons” or “Button order.” Drag the “Screen recorder” tile from the available buttons to your active Quick Panel.
Step 3: Configure Recording Settings
- Tap and Hold (Optional for Settings): For initial setup or to adjust settings, tap and hold the “Screen recorder” icon in the Quick Panel. This will take you to its dedicated settings page.
- Adjust Settings:
- Sound: Choose “Media sounds” (for in-game audio only), “Media sounds and mic” (for game audio + your voice), or “No sound.” For gameplay, “Media sounds and mic” is often preferred.
- Video quality: Select your desired resolution (e.g., 1080p, 720p). Higher quality means larger file sizes.
- Selfie video size: If you choose to record your face using the front camera, you can adjust the size of your Picture-in-Picture (PiP) overlay.
Step 4: Start Recording
- Tap the Icon: Tap the “Screen recorder” icon (a single tap, not long-press) in the Quick Panel.
- Sound Selection Pop-up: A small pop-up will appear, asking you to confirm your sound settings (No sound, Media sounds, Media sounds and mic). Select your preference.
- Start Recording: Tap “Start recording.” A 3-second countdown will begin.
- Open Your Game: After the countdown, quickly open the game you want to record. The recording will begin automatically.
Step 5: Control and Stop Recording
- On-screen Controls: A small, transparent toolbar will appear on your screen during recording.
- Pen icon: Allows you to draw or write on the screen (useful for tutorials).
- Person icon (PiP): Toggles your front-facing camera on/off for a reaction overlay.
- Pause button (||): Temporarily pauses the recording.
- Stop button (Square): Stops the recording and saves the video.
- Stop Recording: Tap the Stop button on the toolbar when you’re finished. The video will be saved to your phone’s Gallery app (usually in a “Screen recordings” album).
Method 2: Using Game Launcher and Game Booster (Dedicated Gaming Tools)
Game Launcher is a central hub for all your games, and Game Booster (formerly Game Tools on some older devices) provides in-game optimization and recording features. This method offers more granular control specific to gaming.
Step 1: Enable Game Launcher
- Open Settings: Go to your phone’s Settings app.
- Navigate to Advanced Features: Tap on Advanced features.
- Find Game Launcher: Scroll down and tap on Game Launcher.
- Enable Toggle: Ensure the “Game Launcher” toggle is turned on. A shortcut to Game Launcher will appear on your home screen or app drawer.
Step 2: Add Your Game to Game Launcher
- Open Game Launcher: Tap the Game Launcher icon.
- Add Games: Your installed games should automatically appear in the Game Launcher. If a game is missing, tap the three vertical dots or the plus icon in the top right corner, then select “Add apps” to manually add it.
Step 3: Launch Game and Access Game Booster/Game Tools
- Launch Game: From within the Game Launcher, tap on the game you want to record.
- Access Game Booster/Tools: While in the game, swipe from the bottom of the screen (or from the side, depending on your navigation bar settings and phone orientation). This should bring up the Game Booster icon (often a small game controller) or the navigation bar with Game Tools icon.
- Game Booster Icon: If you see the Game Booster icon, tap it. This opens the Game Booster menu.
- Game Tools Icon: If you have an older device with Game Tools, tap on the floating game controller icon or swipe up from the navigation bar.
Step 4: Configure and Start Recording via Game Booster
- Find Record Button: In the Game Booster menu (or Game Tools overlay), look for the “Record” button or a camera icon.
- Recording Settings (within Game Booster):
- Tap on the Settings gear icon within the Game Booster overlay (or go to Settings > Advanced features > Game Booster settings).
- Here you can configure:
- Resolution: Choose video quality (e.g., 1920×1080).
- Bitrate: Adjust the data rate for video quality (higher Mbps means better quality, larger files).
- Audio Source: Select “Game audio” (internal sound), “Microphone” (your voice), or “Game audio & microphone.”
- Front camera video size: Adjust size if you’re recording your face.
- Start Recording: Tap the “Record” button. A countdown will begin.
- Control and Stop: Similar to the Quick Panel recorder, a small on-screen control panel will appear. Tap the Stop button (square icon) to end the recording.
Method 3: Using Third-Party Screen Recording Apps
While Samsung’s built-in options are excellent, some users might prefer third-party apps for additional features, more advanced editing capabilities, or if their Samsung model doesn’t have the integrated screen recorder.
Step 1: Download a Reputable App
- Open Play Store: Go to the Google Play Store.
- Search: Search for “screen recorder for gaming” or “game recorder.”
- Popular Options:
- AZ Screen Recorder: Highly popular, offers various settings (resolution, bitrate, FPS), facecam, and a simple editor.
- Mobizen Screen Recorder: Another popular choice with a clean interface, editing tools, and no watermark for basic recordings.
- XRecorder (InShot): Offers good controls for video quality, audio sources, and a user-friendly interface.
- Google Play Games: This app (often pre-installed) has a built-in recording feature for games listed in the Play Store, including facecam support.
- Install: Download and install your chosen app.
Step 2: Configure App Settings
- Open App: Launch the installed third-party screen recorder.
- Grant Permissions: Grant necessary permissions (storage, microphone, draw over other apps).
- Adjust Settings: Dive into the app’s settings to configure:
- Resolution, Quality, FPS: Set these to your preference.
- Audio Source: Choose internal audio (game sound), microphone, or both. Note: Capturing internal audio on Android can sometimes be tricky or require specific permissions depending on the Android version and app.
- Facecam: Enable and adjust if desired.
- Floating Button/Toolbar: Customize the recording controls that appear on screen.
Step 3: Start and Stop Recording
- Activate Floating Button: Most third-party recorders use a floating button or persistent notification to start recording. Tap it.
- Start Recording: Tap the record icon. A countdown usually appears.
- Open Your Game: Switch to your game.
- Stop Recording: Use the floating button, notification panel control, or shake your phone (if the app supports it) to stop the recording.
Where Are My Recordings Saved?
All recorded gameplay videos are typically saved in your phone’s Gallery app or My Files app. Look for folders named “Screen recordings,” “Game Recordings,” or the name of the third-party app you used.
FAQ: How to Record Gameplay on Samsung Phone
Q1: Can I record internal game audio on my Samsung phone?
Yes, most modern Samsung phones with One UI (Android 10 and above) allow you to record internal game audio using the built-in Screen Recorder or Game Booster. When starting a recording, choose “Media sounds” or “Media sounds and mic” as your audio source.
Q2: Does recording gameplay affect game performance (FPS)?
Yes, recording gameplay is a resource-intensive task that uses your phone’s CPU, GPU, and storage. This can lead to a slight decrease in FPS or overall game performance, especially on older or less powerful Samsung models. Using Samsung’s built-in tools (Game Booster) generally offers better optimization than generic third-party apps.
Q3: How do I include my facecam while recording gameplay?
Both Samsung’s built-in Screen Recorder (via the Quick Panel) and many third-party apps offer a Picture-in-Picture (PiP) feature that uses your front-facing camera. Simply enable the “Selfie video” or “Facecam” option in the recording settings before you start, or toggle it on from the on-screen controls during recording.
Q4: Where are my recorded gameplay videos saved on my Samsung phone?
Your recorded gameplay videos are typically saved in the Gallery app on your Samsung phone. Look for an album or folder specifically named “Screen recordings” or “Game Recordings.” If you used a third-party app, it might create its own folder, sometimes under “Movies” or a folder named after the app in your phone’s “My Files” app.
Q5: My Samsung phone doesn’t have the built-in Screen Recorder. What can I do?
If your Samsung phone runs an older Android version or a specific model without the native Screen Recorder in the Quick Panel, you have a few options: * Check Game Launcher/Game Booster: Many Samsung phones, even older ones, have recording capabilities within their Game Launcher or Game Booster/Game Tools feature. * Use Third-Party Apps: Download a reputable third-party screen recorder from the Google Play Store, such as AZ Screen Recorder, Mobizen Screen Recorder, or XRecorder. * Update Software: Ensure your phone’s One UI and Android versions are fully updated, as newer versions often introduce or improve built-in features.


